Reduce Thermal Throttling on your Apple M1 Macbook Air to increase persistent load performance

Last year when Apple presented their new Apple Silicon SoC - namely the M1 - I couldn't believe how much performance the M1 would have in real world scenarios.
After checking the first reviews and thinking about my use case at home - doing the tax, rendering movies from time to time and just surfing the web, listening to music I was convinced, changing from my 2020 Intel Macbook Pro would be the right decision because my largest pro argument was battery lifetime which was horrible in the Intel machine.
When I thought about it if I should buy an Air or the new M1 Macbook Pro, I was quite sure that the performance must be roughly the same. Both use the M1. The Air has no fan, so only persistent load performance would suffer. But this is not a big deal, since the M1 in the Air is still a beast.
Nevertheless, these days I saw some Youtube videos that showed how to enhance heat dissipation in the MBA to reduce the thermal throttling of the M1 under persistent load and thus increase overall performance. Thermal throttling itself is very helpful since otherwise heat could destroy the M1.
Why another how-to?
Well, this is a good question.
When I watched these videos it was quite clear what to do but when I opened my MBA I saw that my back cover had an additional buffer piece attached and no one said exactly how large the thermal pads should be.
I want to tell you these things and show you the steps one by one. I also made some simple benchmarks myself to proof, that it really works. And it's easily reversible when you need to repair your MBA or want to sell it later.
So let's go!
Disclaimer: I do not take any responsibilities for damages on your Macbook if you follow my tutorial. This can void your warranty.
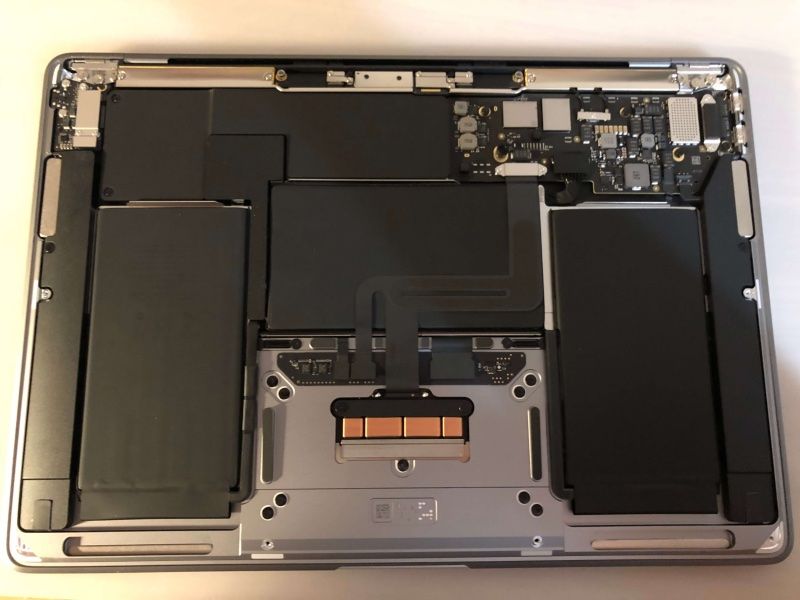
Opening up your Macbook
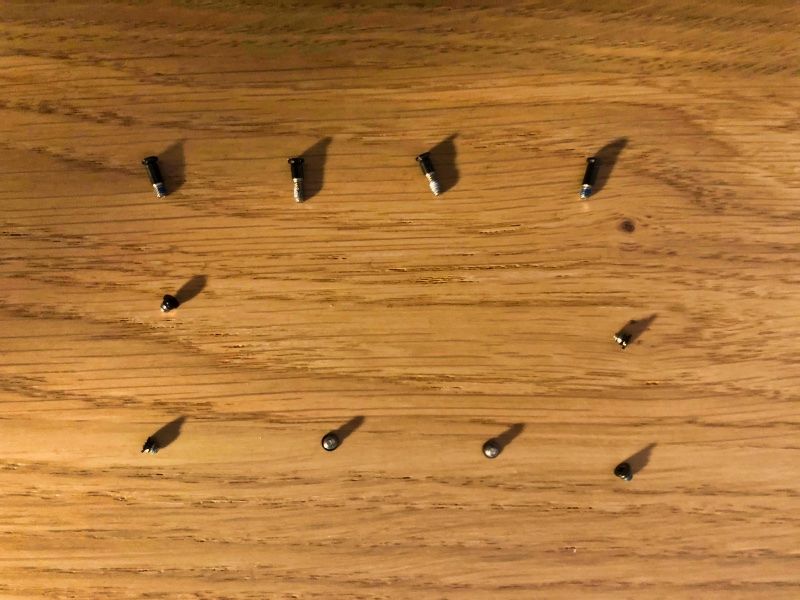
At first, get a suitable pentalobe screwdriver (P5) to open up the back cover.
Make sure to lay down the screws as you get them out, so the screw gets back into it's original hole at the end again since they're not similar in length.
Here is a picture of how it should look like.
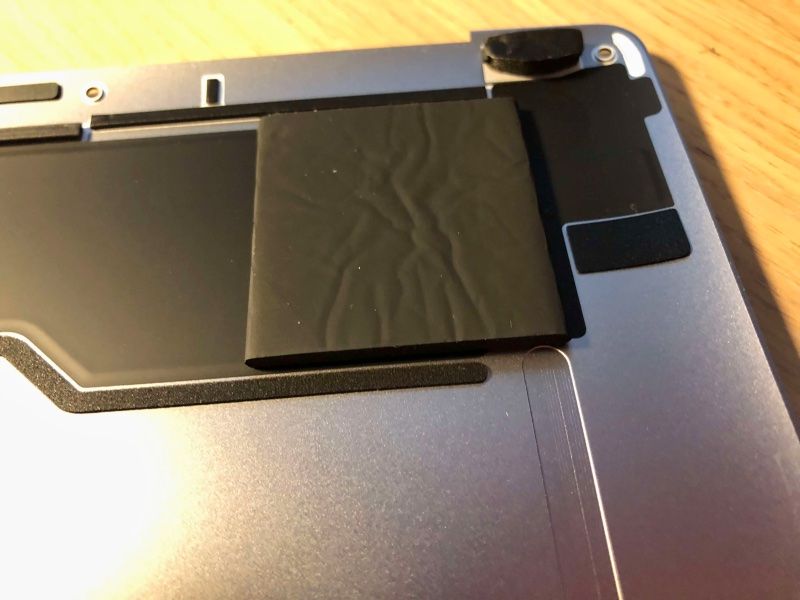
The back cover of newer and/or european back covers has an additional cushion or buffer piece attached that I haven't seen on the Youtube videos. You can simply peel this off the back cover and proceed.
Preparing the thermal pads
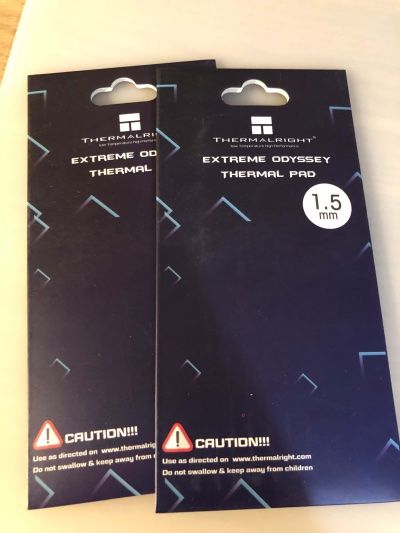
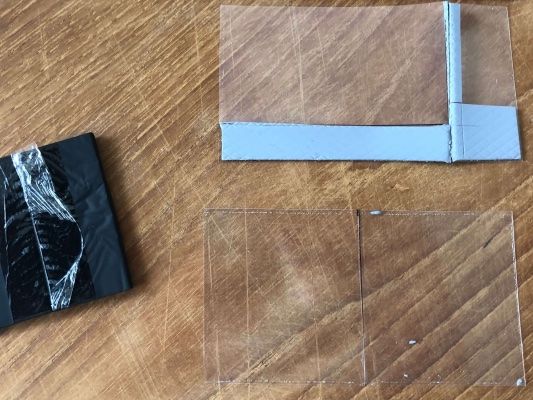
I also bought the same thermal pads like some others, due to the fact that they already found good ones, in terms of heat dissipation and that they also fit quite well in terms of size
I bought the Thermalright Extreme Odyssey pads with 1.5mm thickness.
Now, here is how to cut them. Use a sharp knife for that and peel off the blue side for cutting. The transparent plastic is not really cutable.
First pad: Cut it exactly in half on the long side. We will put both parts on top of each other later
Second pad: Cut one 6.5cm long and 3.7cm wide piece out of it and a smaller second piece of 3cm by 1.5cm.
I made a shot out of the cutted pads.
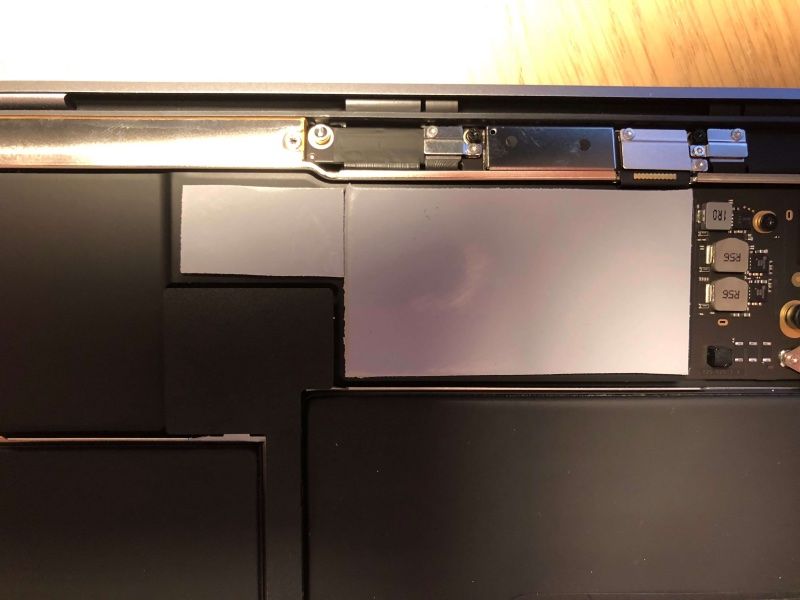
Putting the pieces together
Now start with the larger piece from the second pad first and put it to the right of the heatpipe. Then put up the smallest piece next to it on the left side.
Afterwards stack the two similar sized pieces on top of each other and put them on the left more set back part of the heatpipe so in the end the pieces are all the same height. See the next images for reference.
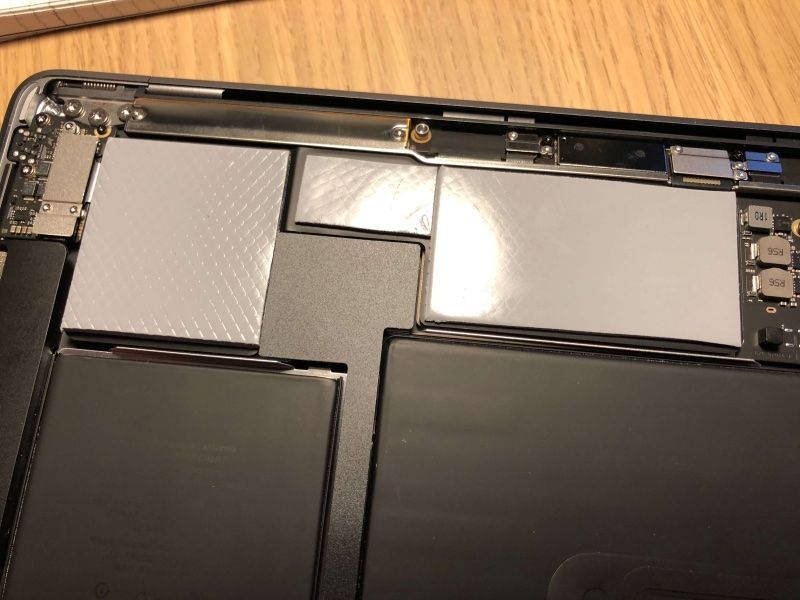
Reassemble your machine
Now, that's already it. Put back up your back cover and put the screws back in. On to top left side, the back cover will press a bit against the stacked thermal pads. That's good as the connection between the two will help dissipating heat from the M1 to the aluminium back cover. This is what enables the M1 to throttle performance down much later.
In fact, I also made some Geekbench 5 and Cinebench R23 benchmarks, to really see the performance gain with my own eyes. It's now almost the same as a Macbook Pro M1 with the fan. For all measurements in the table below, I used the same environmental conditions and ran each test 3 times and made an average out of them.
| Geekbench 5 (Single Core) | Geekbench 5 (Multi-Core) | Geekbench 5 (Metal) | Cinebench R23 (Multi-Core) | |
|---|---|---|---|---|
| MBA | 1742 | 7617 | 20451 | 6423 |
| Modded MBA | 1750 | 7622 | 20799 | 7734 |
Conclusion
As you can see, short benchmarks don't really make a difference, but longer running persistent load where heat can be dissipated better over a longer period lets the M1 shine. In fact it's already quite near the M1 Macbook Pro.
Enjoy your free additional performance on your Macbook Air M1 for just some bucks.